http://robertdunaway.github.io
Gulp code kata list
All code katas lists
![]()
002 Gulp - setting up gulp & first task
Duration
10 minutes
Brief
In this kata we are going to set up a Gulp skeleton and create a test task.
For more information
BING/GOOGLE: “Gulp Getting Started”
Book:
Gulp - Quick guide to getting up and running today
Instructions
Get tutorial folder or the entire katas-Gulp repo.
Open the [before/*.sln] file and execute the kata.
Feel free to execute this kata multiple times because repetition creates motor memory.
Github
- Before (start kata with this)
- After
Kata
In the before solution, create the files and programs necessary to use Gulp.
Review
These katas are demonstrated using Visual Studio 2015 which installs NodeJS so it is assumed Node is installed. If Node is not installed, visit https://nodejs.org/en/ and install it. NPM is Node’s package manager and we will be using it extensively.
First, navigate to the root director of your project, at the command line, and install Gulp both globally and locally.
npm install gulp -g
Notice the “-g” means global.
Now install Gulp locally. IE: without the “-g”
npm install gulp --save-dev
Notice the “--save-dev”. This tells npm to save the installed program to the package.json file. The package.json file holds metadata about your application.
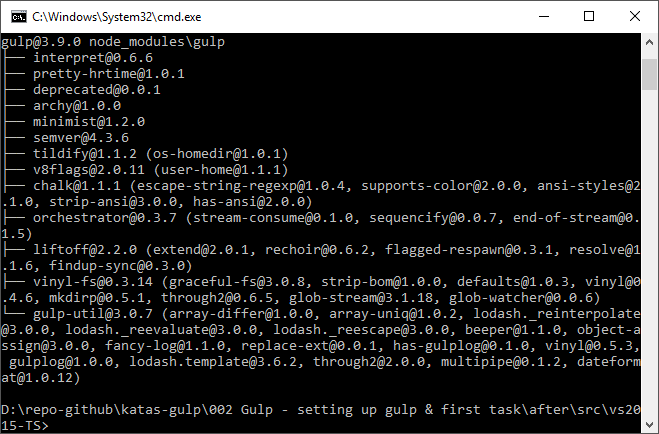
If your screen looks like this, you are in good shape.
At this point the “--save-dev” command has caused the package.json to be created. This can also be accomplished by executing the command npm init.
If you don’t see the new file, select “Show All Files” in the Solution Explorer. You’ll see both the package.json file and node_modules folder.
Opening the package.json file, at this point, you will see.
{
  "version": "1.0.0",
  "name": "ASP.NET",
  "private": true,
  "devDependencies": {
    "gulp": "^3.9.0"
  }
}
Now is a good time to create our test task.
Create a file named gulpfile.js. This will hold all our Gulp tasks.
Paste into gulpfile.js the following code.
var gulp = require('gulp');

gulp.task('default', function() {
  console.log('my first gulp task…');
});
The gulp file can be as complex or simple as you design but you need at least two components.
All plugins, including gulp itself, must be required. Here is the require statement we used. To access it’s functions use the variable name.
var gulp = require('gulp');
The second component, and the point of gulp, is the task.
gulp.task('default', function() {
  console.log('my first gulp task…');
});
This is the “default” task, meaning, if no tasks are passed to the gulp command then the default task is run.
If you are using Visual Studio then you can expect to see the default task in the “Task Runner Explorer”. If you just created the gulpfile.js file then you may need to restart Visual Studio.
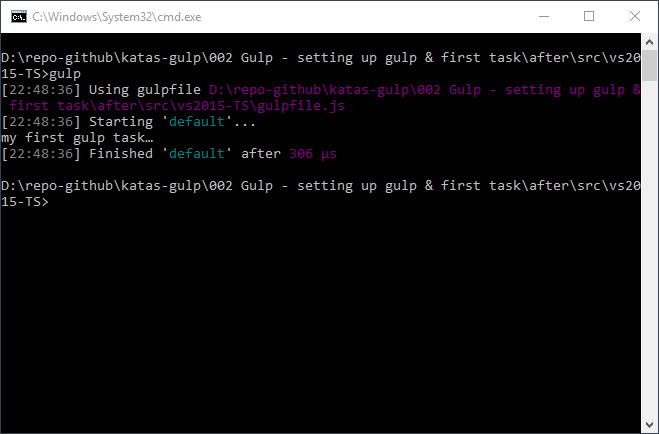
You can run the task by right clicking the default task and selecting “run”.
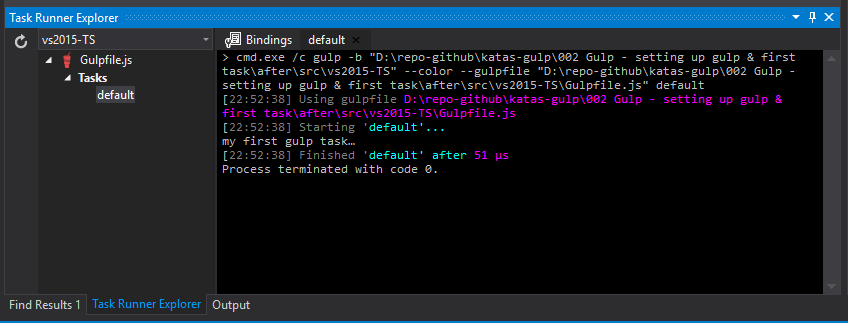
You’ll notice the output is exactly the same as the output of the command line.
Next
Take a few minutes and imagine more examples.
![]()


0 comments:
Post a Comment