Gulp Tutorial - Part 12 Typescript
The Mashup is a learning tool that serves as a seed project for line-of-business applications. It’s goal is a shortened learning curve for building modern business applications and the reduction of technical debt.

This tutorial and more can be found in
Gulp Tutorial - Part 12
Typescript
TypeScript is a language used to build large-scale JavaScript applications. TypeScript code is transpiled down to ES5 JavaScript. Angular 2.0 is written in TypeScript and ES2015/ES2016, formerly ES6/ES7, features are available in TypeScript.
Links for installing TypeScript, for your version of Visual Studio, are here
http://www.typescriptlang.org/
Dan Wahlin’s take on TypeScript in a Gulp workflow
http://weblogs.asp.net/dwahlin/creating-a-typescript-workflow-with-gulp
The TypeScript file for this tutorial
The MashupJS isn’t using TypeScript yet so I created a TypeScript file for this example.
I created a file in the root of the scr folder named myTypeScript.ts.
I added the following code snippet from http://www.typescriptlang.org/Playground to the new file.
class Greeter {
    greeting: string;
    constructor(message: string) {
        this.greeting = message;
    }
    greet() {
        return "Hello, " + this.greeting;
    }
}

var greeter = new Greeter("world");

var button = document.createElement('button');
button.textContent = "Say Hello";
button.onclick = function() {
    alert(greeter.greet());
}
document.body.appendChild(button);
Expected result
Once we’ve transpiled the TypeScript down to JavaScript (ES5) we will get a myTypeScript.js file and a minified version. Here is what the JS file should look like.
var Greeter = (function () {
    function Greeter(message) {
        this.greeting = message;
    }
    Greeter.prototype.greet = function () {
        return "Hello, " + this.greeting;
    };
    return Greeter;
})();
var greeter = new Greeter("world");
var button = document.createElement('button');
button.textContent = "Say Hello";
button.onclick = function () {
    alert(greeter.greet());
};
document.body.appendChild(button);
Installing plugins
npm install gulp-typescript --save-dev
npm install gulp-tslint --save-dev
npm install gulp-tslint-stylish --save-dev
Add the new plugins to your Gulp required list
, ts                    = require('gulp-typescript')
, tslint                = require('gulp-tslint')
, tsstylish             = require('gulp-tslint-stylish')
Add the new task to your gulpfile.js
gulp.task('tscompile', function () {
    return gulp.src(['./dist/**/*.ts', '!dist/core/lib/**/*.*', '!dist/core/css/**/*.*'])
      .pipe(plumber({
          errorHandler: onError
      }))
    .pipe(sourcemaps.init())
    .pipe(ts({
        target: 'ES5',
        declarationFiles: false,
        noExternalResolve: true
    }))
    .pipe(rename({ extname: '.js' }))
    .pipe(gulp.dest('dist/./'));
});
And add the new task to your default task
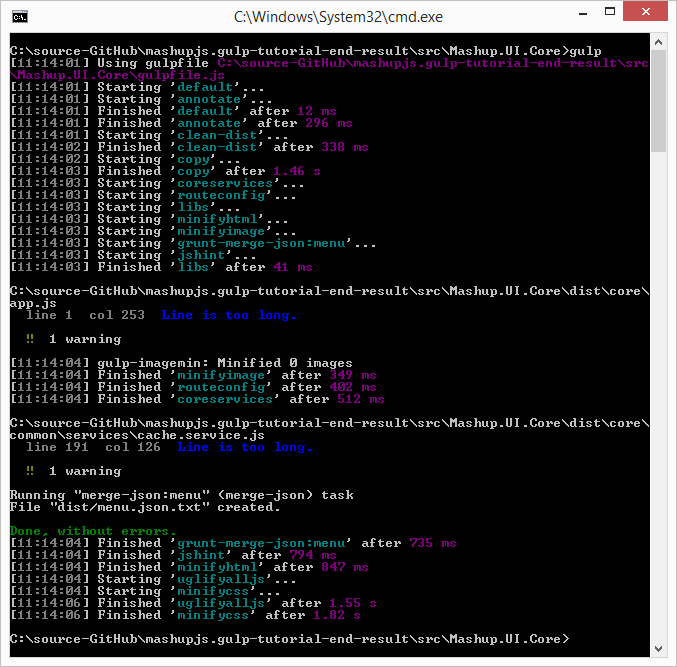
gulp.task('default', function () {
    runSequence('annotate', 'clean-dist', 'copy',
                ['coreservices', 'routeconfig', 'libs', 'minifyhtml', 'minifyimage'
                    , 'grunt-merge-json:menu', 'jshint', 'tscompile'],
                ['uglifyalljs', 'minifycss']);
});
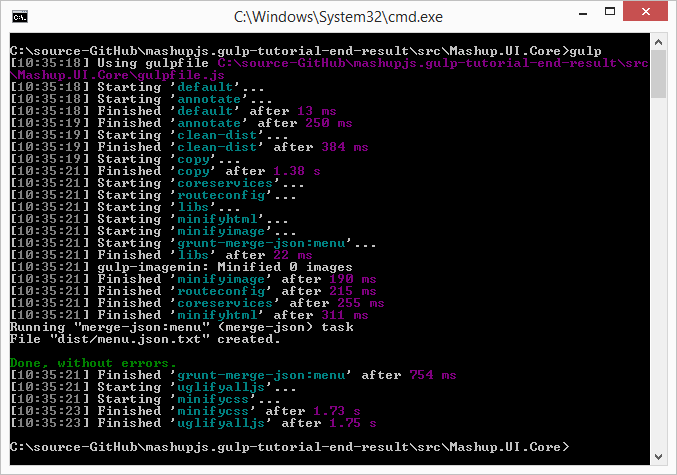
Executing the task
You can execute the task individually
gulp
How it works
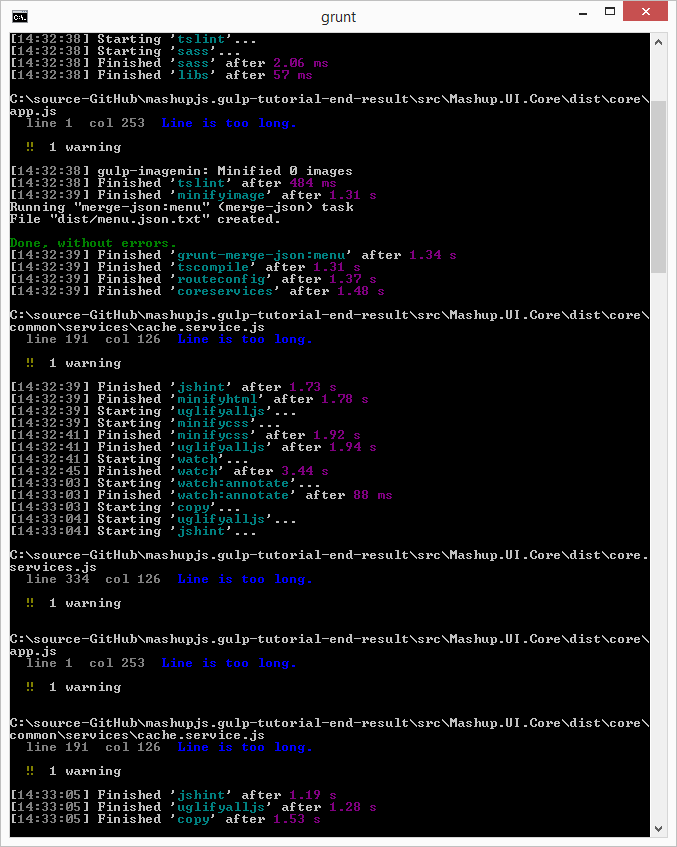
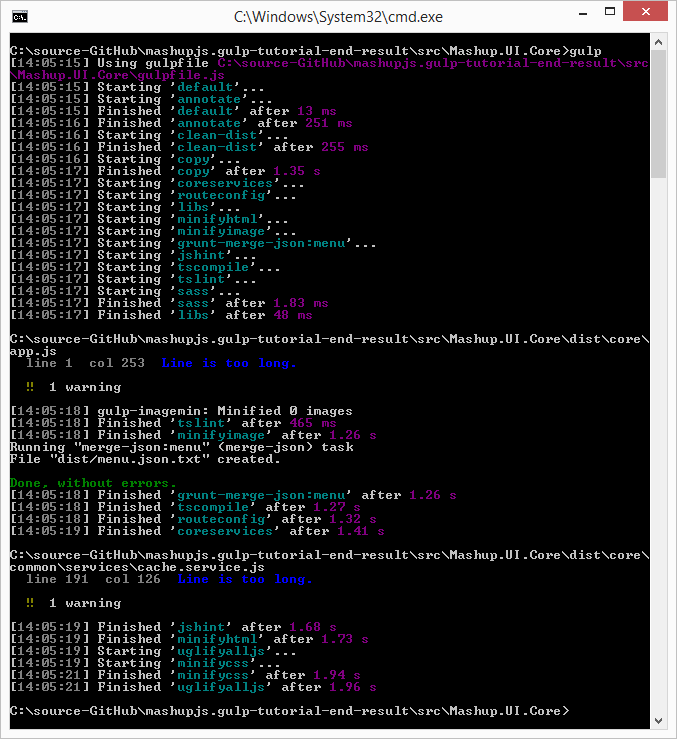
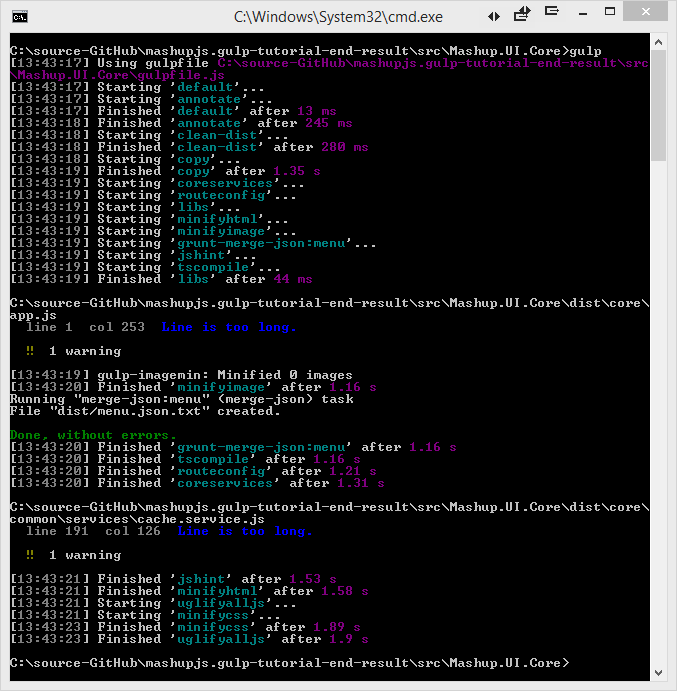
First the task transpiles the TypeScript code down to ES5, ECMAScript 5.
Then the new ES5 JavaScript is emitted. This file will not be used by the min.js.map. The map file will point directly to the TypeScript, “.ts”, file. The reason we are emitting the “.js” is so the TypeScript code can participate in the JSHint process. You’ll notice the ‘jshint’ task now has a dependency on the ‘tscompile’ task via the runSequence function.
Finally the TypeScript file is emitted as a minified JavaScript file with an associated map file linking it back to the TypeScript file.
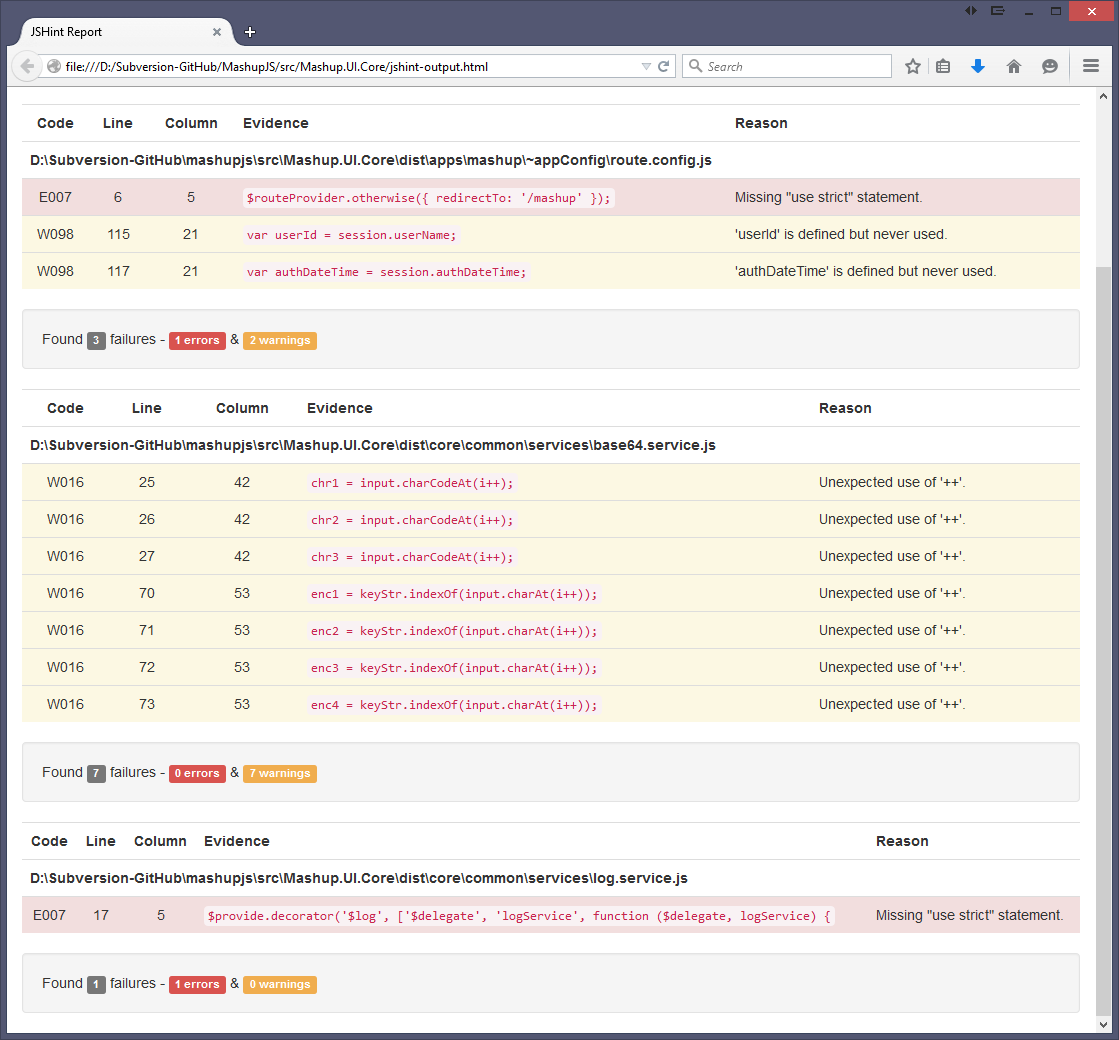
jshint-output.html
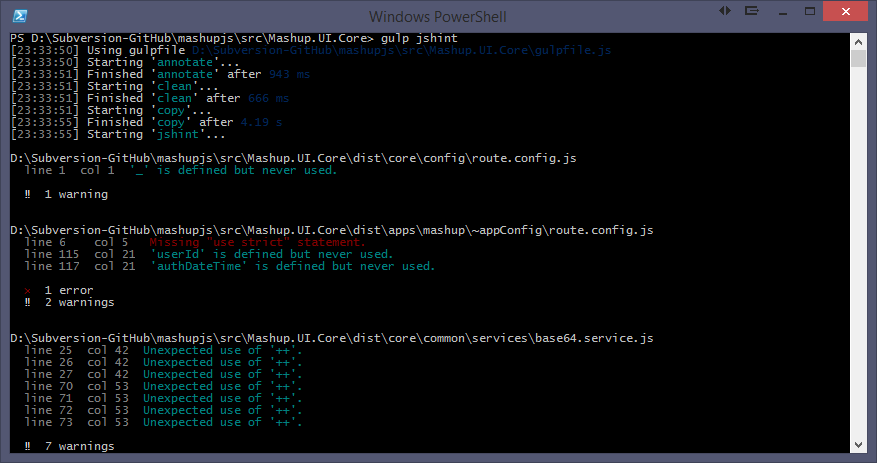
If you run the new task with gulp tscompile, you’ll notice the jshint-output.html file has been updated.
If you double-click this file from explorer.exe, then you’ll notice our JavaScript, emitted by TypeScript, has a few issues.
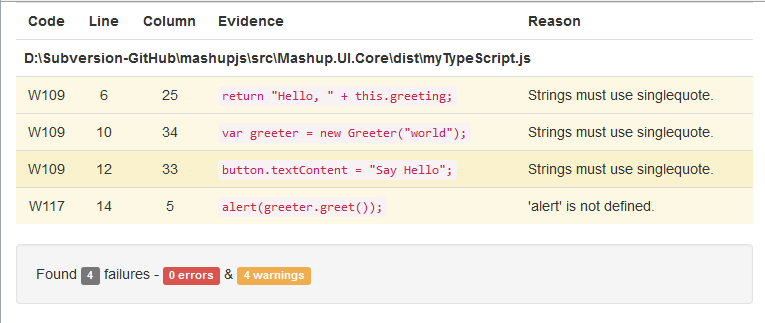
Fixing the JSHint warnings
These are pretty simple changes to make. Replace all the double quotes with single quotes and define the alert() method and JSHint is satisfied. The end result should be this.
/*global alert */
class Greeter {
    greeting: string;
    constructor(message: string) {
        this.greeting = message;
    }
    greet() {
        return 'Hello, ' + this.greeting;
    }
}

var greeter = new Greeter('world');

var button = document.createElement('button');
button.textContent = 'Say Hello';
button.onclick = function () {
    alert(greeter.greet());
}

document.body.appendChild(button);
Linting TypeScript
TypeScript has language constructs ES5 JavaScript does next so automating a TypeScript specific linter might seem redundant. It’s not.
Add the following task to your gulpfile.js
gulp.task('tslint', ['copy'], function () {
    return gulp.src(['./dist/**/*.ts', '!dist/core/lib/**/*.*', '!dist/core/css/**/*.*'])
        .pipe(tslint())
        .pipe(tslint.report('verbose', {
            emitError: false,
            sort: true,
            bell: true
        }))
});
TSLint reporter
I was unable to find a plugin to export TSLint errors to an HTML file as we did for JSHint. If this plugin becomes available, I’ll add it to this post.
TSLint configuration
Configuration information for TSLint is stored in a file named tslint.json.
Here is a good starting point. I’ve borrowed this from other developer posts and it seems to be a good list.
Create a tslint.json file in the same folder as your gulpfile.js and package.json and add the following code to it.
{
    "rules": {
        "class-name": true,
        "curly": true,
        "eofline": false,
        "forin": true,
        "indent": [true, 4],
        "label-position": true,
        "label-undefined": true,
        "max-line-length": [true, 140],
        "no-arg": true,
        "no-bitwise": true,
        "no-console": [true,
          "debug",
          "info",
          "time",
          "timeEnd",
          "trace"
        ],
        "no-construct": true,
        "no-debugger": true,
        "no-duplicate-key": true,
        "no-duplicate-variable": true,
        "no-empty": true,
        "no-eval": true,
        "no-imports": true,
        "no-string-literal": false,
        "no-trailing-comma": true,
        "no-trailing-whitespace": true,
        "no-unused-variable": false,
        "no-unreachable": true,
        "no-use-before-declare": true,
        "one-line": [true,
          "check-open-brace",
          "check-catch",
          "check-else",
          "check-whitespace"
        ],
        "quotemark": [true, "single"],
        "radix": true,
        "semicolon": true,
        "triple-equals": [true, "allow-null-check"],
        "variable-name": false,
        "whitespace": [true,
          "check-branch",
          "check-decl",
          "check-operator",
          "check-separator"
        ]
    }
}
Run the default task
gulp

https://www.npmjs.com/package/gulp-typescript
Source code for this tutorial
Start the tutorial using this code base:
A completed tutorial can be found here:
This tutorial and more can be found in