WebApi-HowToCreateForMashup
Create WebApi for the Mashup & CORS
The
Mashup is a learning tool that also serves as a bootstrap project for line-of-business applications.
The WebApi or any restFul service provides back-end support for SPA applications.
Intro
This is a step-by-step tutorial for creating a WebApi for the Mashup.
The WebApi provides the back-end support for your Angular application. A typical SPA application with Angular will consist of a WebApi and index.html page on the same web site. This is an easy configuration to spin up and start coding against.
The challenge arises when your application grows and your enterprise expects to share programming resources. The client may no longer be coming from the same domain and you enter into cross domain sharing of resources. This is where CORS comes into play.
Here is a step-by-step tutorial for creating a WebApi for the Mashup that addresses the CORS issue.
Creating the WebApi
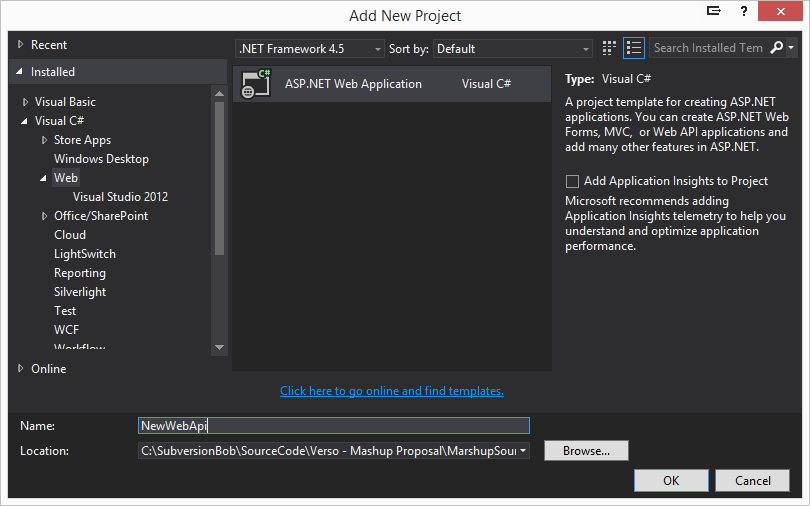
Using Visual Studio, add a new project to your existing Angular solution.
Right click the solution and select
Add -> New Project.
Select
ASP.NET Web Application and give your project a
name, then press
OK.
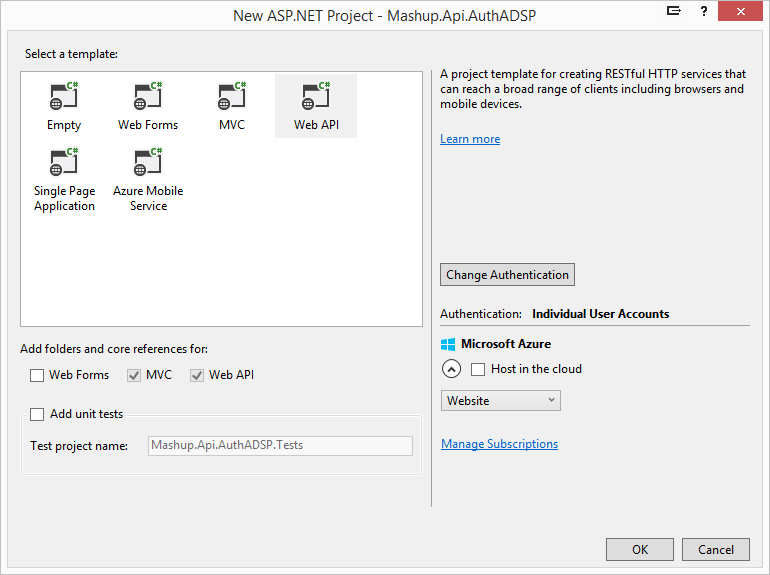
The template page loads.
Select
Web API in the “Select a template” section.
MVC and
Web API will be automatically selected.
Select “Change Authentication” and select
No Authentication and press
OK.
Verify
Host in the cloud is unchecked.
Press
OK.
Using the selected template and settings, Visual Studio creates the new Web API.
Getting CORS to work
CORS support is already built into the Web Api. What we need to do is add headers to requests so Chrome and Firefox can access our resources.
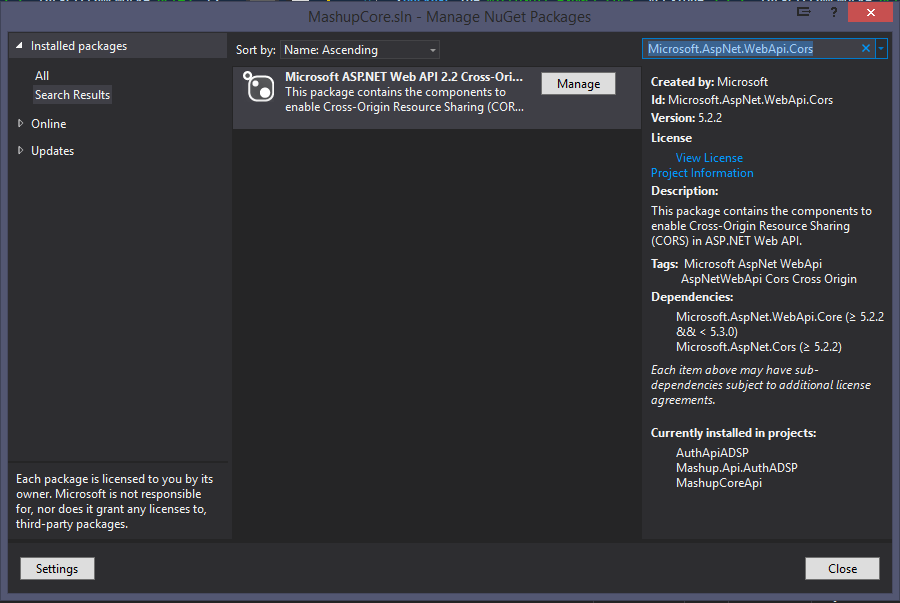
NOTE: I’ve had inconsistent experiences with WebApi and CORS. Make sure you’ve installed the NuGet package giving you Microsoft.AspNet.WebApi.Cors.
Add the code, below, to your Global.asax in the public class Global.
protected void Application_BeginRequest(object sender, EventArgs e)
{
if (Context.Request.Path.Contains("api/") && Context.Request.HttpMethod == "OPTIONS")
{
Context.Response.AddHeader("Access-Control-Allow-Origin", Context.Request.Headers["Origin"])
Context.Response.AddHeader("Access-Control-Allow-Headers", "Origin, X-Requested-With, Content-Type, Accept")
Context.Response.AddHeader("Access-Control-Allow-Methods", "GET, POST PUT, DELETE, OPTIONS")
Context.Response.AddHeader("Access-Control-Allow-Credentials", "true")
Context.Response.End()
}
}
Enable CORS by adding the following to the Register function of the WebApiConfig.cs
var cors = new EnableCorsAttribute("*", "*", "*") { SupportsCredentials = true };
config.EnableCors(cors);
Add the following to the include session of the WebApiConfig.cs.
using System.Web.Http.Cors
Attribute Routing
To enable
Attribute Routing, add the following code to your
App_Start/WebApiConfig.cs file.
Oaky, never mind. Since the last time I did this, it seems the new Web API template does this for you. Here is the code that makes Attribute Routing possible.
config.MapHttpAttributeRoutes();
With the rapid changes in technology, it can almost be detrimental to be an early adopter.
As you see above, I was expecting to write extra configuration code but since the time I created the first Mashup Web APIs, the Visual Studio templates have been improved.
You might have noticed the old template only created WebApiConfig.cs and the new template creates both the WebApiConfig.cs and RouteConfig.cs templates.
This leads me to believe I should make it a practice to periodically recreate my projects using the latest Visual Studio templates. This might be a best practice for all third party libraries.
This would be an effort to keep Technical Debt to a minimum. As the projects we create age, they become liabilities. It seems to me the effort to keep projects current is less if done more frequently with fewer changes between versions.
Create an endpoint to test.
In the NewWebAPI’s Controller’s directory create two files.
- Item.cs - as a class with the following content.
using System;
using System.Collections.Generic;
using System.Linq;
using System.Web;

namespace **Leave your namespace here**
{
    public class Item
    {
        public int id { get; set; }
        public string action { get; set; }
        public bool done { get; set; }
        public DateTime completed { get; set; }
        public decimal myDecimal { get; set; }
        public double myDouble { get; set; }
        public long myLong { get; set; }
        public string contact { get; set; }
        public string doneWithIndeterminate { get; set; }
    }
}
Add the following code to it. Remember to swap out your namespace.
using System;
using System.Collections.Generic;
using System.Linq;
using System.Net;
using System.Net.Http;
using System.Web.Http;
namespace **Leave your namespace here**
{
[Authorize]
public class ItemController : ApiController
{
List<Item> _items = new List<Item> {
new Item { id = 1, action = "Buy Gloves", done = false, completed = Convert.ToDateTime("5/28/2014"), myDecimal = 1.1m, myDouble = 1.00, myLong = 64, contact = "name1@domain.com"},
new Item { id = 2, action = "Get Hair cut", done = false, completed = Convert.ToDateTime("5/28/2014"), myDecimal = 1.2m, myDouble = 1.00, myLong = 64, contact = "name1@domain.com"},
new Item { id = 3, action = "Collect Tickets", done = true, completed = Convert.ToDateTime("5/28/2014"), myDecimal = 1.3m, myDouble = 1.00, myLong = 64, contact = "name1@domain.com"},
new Item { id = 4, action = "Call Joe", done = false, completed = Convert.ToDateTime("5/28/2014"), myDecimal = 1.4m, myDouble = 1.00, myLong = 64, contact = "name1@domain.com"},
new Item { id = 5, action = "Check TODO List", done = false, completed = Convert.ToDateTime("6/28/2014"), myDecimal = 2.1m, myDouble = 1.00, myLong = 64, contact = "name1@domain.com"},
new Item { id = 6, action = "Call the tax dude", done = false, completed = Convert.ToDateTime("6/28/2014"), myDecimal = 2.1m, myDouble = 1.00, myLong = 64, contact = "name1@domain.com"},
new Item { id = 7, action = "Feed the dogs", done = true, completed = Convert.ToDateTime("6/28/2014"), myDecimal = 2.1m, myDouble = 1.00, myLong = 64, contact = "name2@domain.com"},
new Item { id = 8, action = "Start spring cleaning", done = false, completed = Convert.ToDateTime("6/28/2014"), myDecimal = 3.1m, myDouble = 1.00, myLong = 64, contact = "name2@domain.com"},
new Item { id = 9, action = "Schedule checkup", done = false, completed = Convert.ToDateTime("7/28/2014"), myDecimal = 3.1m, myDouble = 1.00, myLong = 64, contact = "name2@domain.com"},
new Item { id = 10, action = "Sweep porch", done = false, completed = Convert.ToDateTime("7/28/2014"), myDecimal = 1.1m, myDouble = 1.00, myLong = 64, contact = "name2@domain.com"},
new Item { id = 11, action = "Do dishes", done = true, completed = Convert.ToDateTime("7/28/2014"), myDecimal = 1.1m, myDouble = 2.00, myLong = 64, contact = "name2@domain.com"},
new Item { id = 12, action = "Take out trash", done = false, completed = Convert.ToDateTime("7/28/2014"), myDecimal = 1.1m, myDouble = 2.00, myLong = 64, contact = "name2@domain.com"},
new Item { id = 13, action = "Do your homework!", done = true, completed = Convert.ToDateTime("1/28/2014"), myDecimal = 1.1m, myDouble = 3.00, myLong = 64, contact = "name2@domain.com"}
};
[Route("api/Items")]
[HttpGet]
public List<Item> GetAllItems()
{
return _items;
}
[Route("api/Items/{id:int:min(2)}")]
[HttpGet]
public List<Item> GetItem(int id)
{
var items = new List<Item>();
var item = _items.FirstOrDefault((p) => p.id == id);
items.Add(item);
return items;
}
}
}
Before we call this new Web Api let’s tell it to return all data as JSON.
Open your
App_Start/WebApiConfig.cs file and copy this line at the end.
// By default Web Api wants to return XML.  (This is confusing because RestFul is based on JSON)
// This line changes the default return type to JSON.
config.Formatters.JsonFormatter.SupportedMediaTypes.Add(new MediaTypeHeaderValue("text/html"));
This will require a new using statement.
using System.Net.Http.Headers
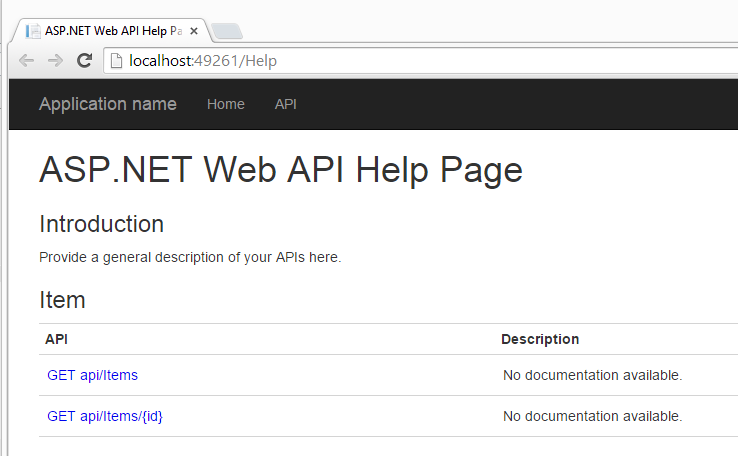
Help page
You’ll notice many more files, created by the template we used, than are necessary to create a WebApi. This is because the WebApi template also creates a web UI. You can build off this UI but our intention is only to use the UI as a helper for building WebApi(s).
I’m choosing to keep the UI pieces because I like the Help feature. It would not be unreasonable to remove all files except those needed to create the WebApi. In fact, if this is your intent upfront then rather than select WebApi as a template, select Empty as your template, then MVC and WebApi below when adding the new project. This tutorial was originally based on this approach, so we know it works.
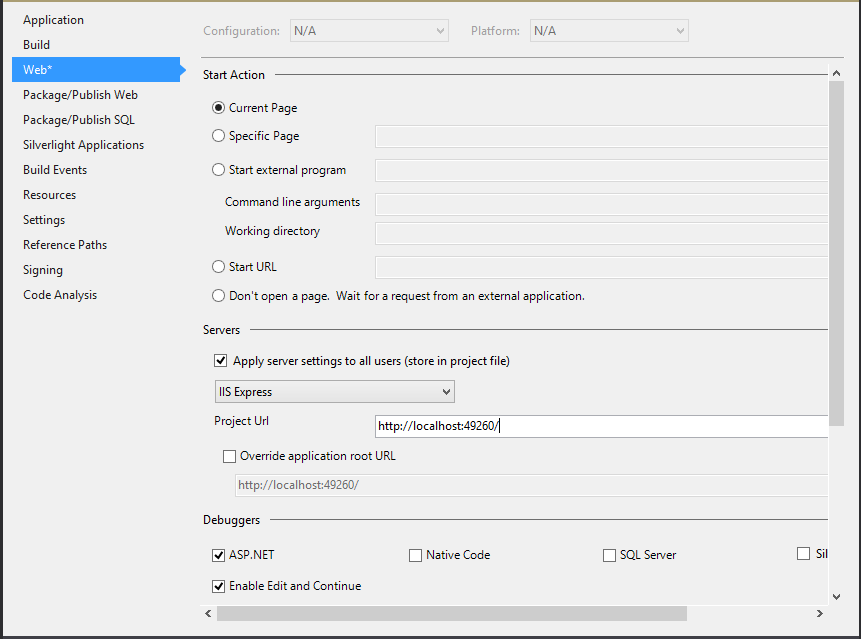
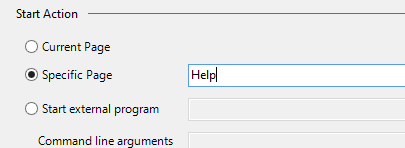
We are not interested in seeing the start page when we start up this project, so we’ll make a slight modification to this project’s properties.
Right click on the project we just created in the Solution Explorer and select
Properties.
Select the
Web tab then change the value of Specific Page to “Help”.
Call the WebApi
Set the new WebApi as the startup project and press the Run button in Visual Studio.
Enter
localhost:49261/api/Items
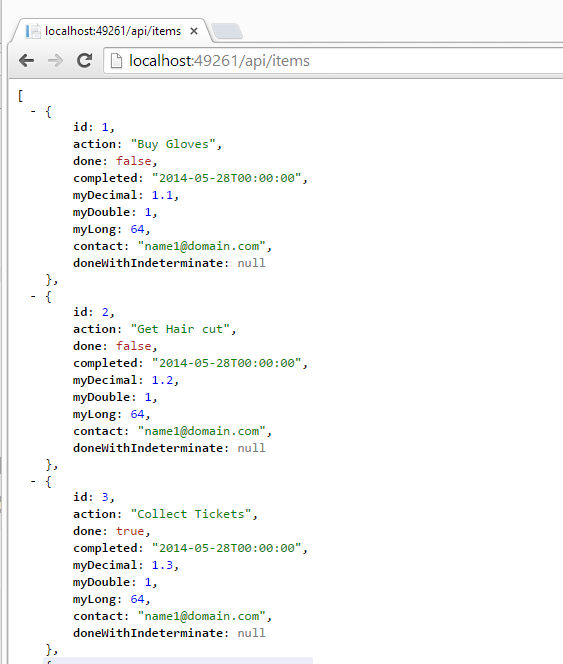
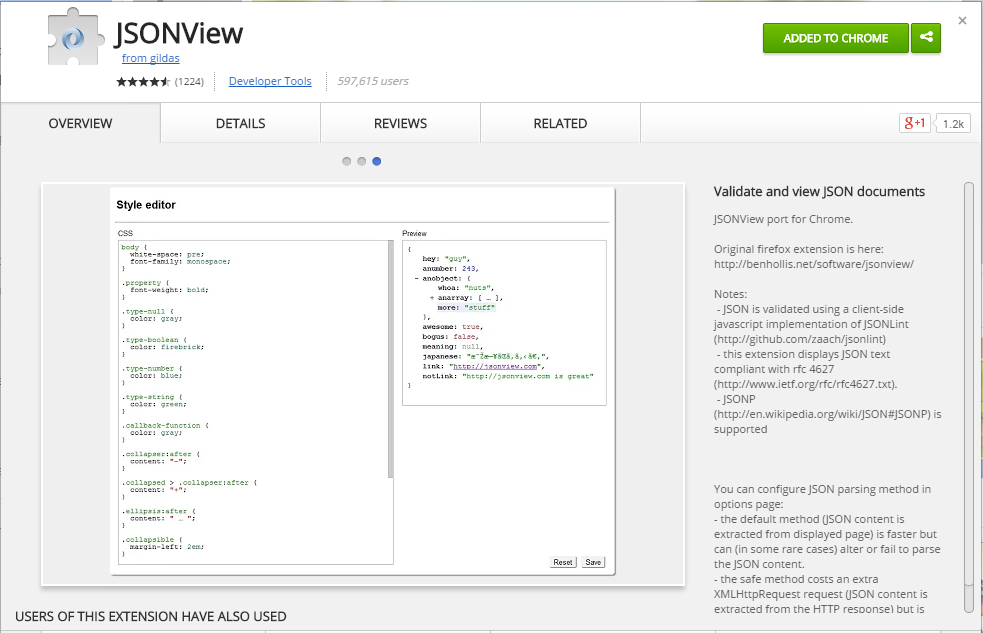
You might have a jumbled mess of JSON on your screen. To clean that up you’ll want to use some kind of browser plug-in. What I’m using here is JSONView.
One more thing
This will likely go away as templates improve and WebApi matures but for now, as of Nov 2014, you need up update your WebApi 2.2 NuGet package.
The problem is Attribute Routing and CORS don’t get along well until you install the
Microsoft ASP.NET Web API 2.2 and the
Version 5.2.2 package version. The Visual Studio template uses the
5.2.0 version of the package and it
don’t work so well.
Once this is installed you should be able to access WebApi from your AngularJS client even when it’s not part of the Origin domain. You can build WebApi(s) for your enterprise and not specifically for one client. Also, you’ll find this useful when building hybrid mobile applications whose
origin will never be the same as we WebApi.


