• Search form is empty!

  • Showing posts with label VSC. Show all posts
    Showing posts with label VSC. Show all posts

    http://robertdunaway.github.io

    http://mashupjs.github.io

    The Mashup is a learning tool that serves as a seed project for line-of-business applications. It’s goal is a shortened learning curve for building modern business applications and the reduction of technical debt.
    Smiley face

    This tutorial and more can be found in

    Gulp - Quick guide to getting up and running today

    Gulp Tutorial - Part 5

    Handling Errors with Plumber


    From the command-line install

    npm install gulp-plumber --save-dev


    Add the module to the Gulp file

    , plumber = require('gulp-plumber');


    Add this to the top of your script file. Our plumber will use this function for logging errors to the console.


    var onError = function(err) {
        console.log(err);
    };


    Here is what a task might look like with the plumber() function.
    (Don’t add this code)


    // ---------------------------------------------------------------
    // Watch specific tasks.  This is to support the use of newer.
    // ---------------------------------------------------------------
    gulp.task('watch:annotate', function () {
        return gulp.src(['src/index.controller.js', 'src/core/**/*.js', 'src/apps/**/*.js', '!src/core/lib/**/*', '!/**/*.min.js'], { base: 'src/./' })
          .pipe(plumber({
            errorHandler: onError
          })) 
          .pipe(newer('src/./'))
          .pipe(ngAnnotate())
          .pipe(gulp.dest('src/./'));
    });


    The following tutorials will implement this plumber function with each task we create.


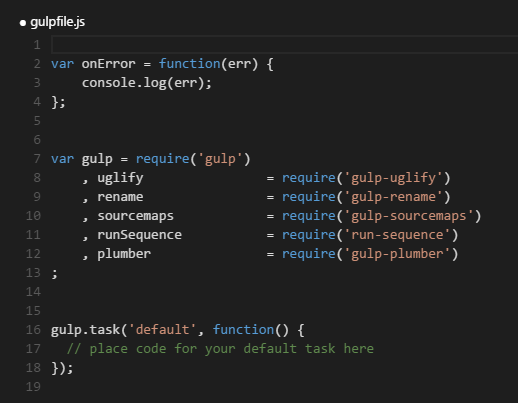
    Currently, your gulpfile.js should look like this:

    enter image description here


    Source code for this tutorial

    Start the tutorial using this code base:

    https://github.com/MashupJS/gulp-tutorial


    A completed tutorial can be found here:

    https://github.com/MashupJS/gulp-tutorial-end-result


    Smiley face

    This tutorial and more can be found in
    Gulp - Quick guide to getting up and running today

    http://robertdunaway.github.io

    http://mashupjs.github.io

    The Mashup is a learning tool that serves as a seed project for line-of-business applications. It’s goal is a shortened learning curve for building modern business applications and the reduction of technical debt.

    Smiley face

    This tutorial and more can be found in
    Gulp - Quick guide to getting up and running today

    Gulp Tutorial - Part 4

    Sequence and Parallel Task Processing

    The ability to execute Gulp tasks in sequence and parallel is still a moving target. By default, Gulp leans toward executing all tasks in parallel because that is the more performant approach.


    The option I chose was “run-sequence”. I chose this after battling with the other options. The Gulp 4 release should resolve many of the issues I struggled with.


    We have not yet created tasks but in preparation, install this plug-in.


    From the command-line install

    npm install run-sequence --save-dev

    Add the module to the gulp file

    , runSequence = require('run-sequence')


    All tasks created in this tutorial will have no other dependencies except the tasks we execute via the Gulp default task. The runSequence function will manage our dependencies. Creating dependencies is a simple option provided by Gulp but this causes tight coupling between tasks.


    For instance, before optimizing files, we will clean out the distribution folder and then copy optimized files back to it. During development, however, cleaning the distribution folder breaks when all files are not copied and optimized back to it. An attempt to copy and optimize every file would cause a delay during development.


    To resolve this, we will not tightly couple tasks, allowing all tasks to be executed when Gulp is run, but only the changes files are executed against when watching files during development.


    Another example where sequence matters is how JavaScript is optimized. Some JavaScript is found in .js files while other JavaScript is found after the compilation of TypeScript down to JavaScript. To minify and optimize JavaScript effectively, it’s better to perform the JavaScript Uglify after the .ts, TypeScript, files have been transpiled. So a dependency exists between TypeScript and JavaScript.


    We can accomplish this with runSequence().


    Here is what a default task might look like when using the runSequence function to manage tasks.
    (Don’t add this code)


    gulp.task('default', function() { runSequence('clean-dist',
                                      'annotate',
                                      'copy',
                                      ['coreservices', 'routeconfig', 'sass', 'tscompile', 'libs', 'grunt-merge-json:menu', 
                                          'tslint', 'jshint', 'minifyhtml', 'minifyimage'],
                                      ['uglifyalljs', 'minifycss'],
                                      'watch'
                                              );
    });

    Here is the sequence of execution

    1 clean-dist

    2 annotate

    3 copy

    4 (run in parallel) coreservices, routeconfig, sass, tscompile, libs, grunt-merge-json:menu, tslint, jshint, minifyhtml, minifyimage

    5 uglifyalljs, minifycss

    6 watch

    These are all tasks you will have created by the end of this multi-part tutorial.

    Optimizing task performance

    Notice the number of tasks executed in step 4. The more tasks you can run in parallel, the faster your process will be. It’s important to optimize your process as much as possible so you can change a piece of code and immediately execute the optimized version without delay.

    Other options

    Gulp 4.0 will have new methods series() and parallel(). This will be the preferred approach once released.


    Orchestrator – is an NPM module that supports series and parallel processing.


    Source code for this tutorial

    Start the tutorial using this code base:

    https://github.com/MashupJS/gulp-tutorial


    A completed tutorial can be found here:

    https://github.com/MashupJS/gulp-tutorial-end-result


    Smiley face

    This tutorial and more can be found in
    Gulp - Quick guide to getting up and running today

    http://robertdunaway.github.io

    http://mashupjs.github.io

    The Mashup is a learning tool that serves as a seed project for line-of-business applications. It’s goal is a shortened learning curve for building modern business applications and the reduction of technical debt.

    Smiley face

    This tutorial and more can be found in
    Gulp - Quick guide to getting up and running today

    Gulp Tutorial - Part 3

    Adding Plugins

    Plugins provide function to the task runner.

    Tip: When searching for plugins, consider the number of downloads the module has on NPM and activity on Github. These are indicators of how active the community is and how much support you can expect. You might find a dozen JavaScript minifiers. Choose the one with the most downloads and most recent activity on Github.


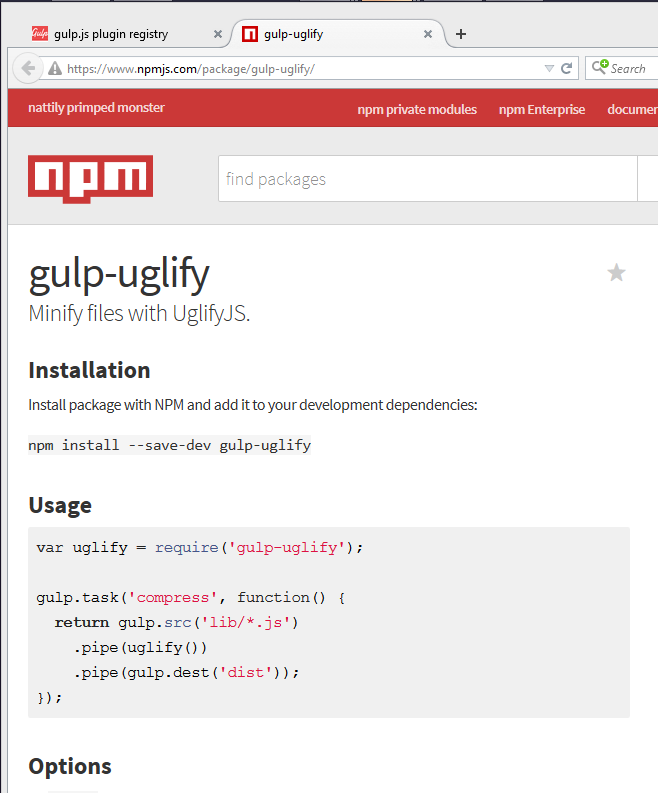
    You can search for plugins here
    http://gulpjs.com/plugins


    Once you’ve found a plugin, navigate to the plugins page. Here you’ll find general information on how to use the plugin and usually a couple examples to get you started.


    enter image description here


    Install a few useful plugins from the commandline of the root of your project. Notice “--save-dev”. This option includes the plugin in the package.json file.


    You’ve already installed Gulp.

    npm install gulp --save-dev


    Go ahead and install a couple more. (Just for fun)

    npm install gulp-uglify --save-dev
    npm install gulp-rename --save-dev
    npm install gulp-sourcemaps --save-dev


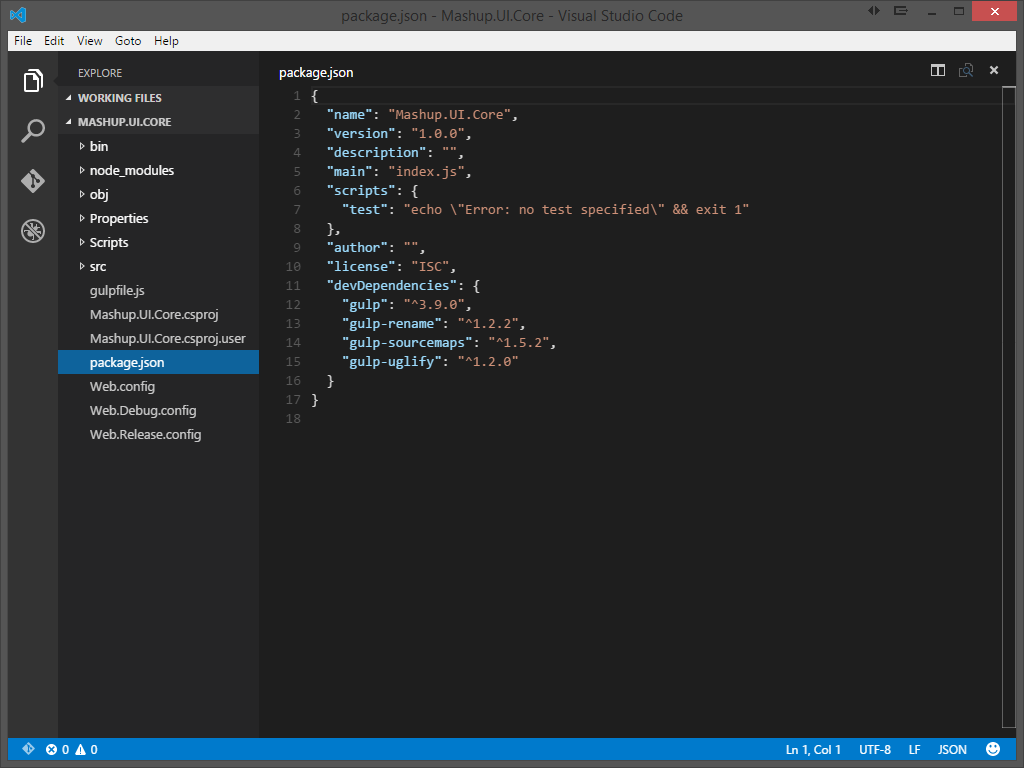
    Viewing the package.json with VSC, you’ll notice the new plugin configurations are saved.


    enter image description here


    To add these plugins to your gulp implementation, add the new plugins to your gulpfile.js.

    var gulp = require('gulp')
        , uglify                = require('gulp-uglify')
        , rename                = require('gulp-rename')
        , sourcemaps            = require('gulp-sourcemaps')
    ;
    gulp.task('default', function() {
      // place code for your default task here
    });

    Syntax for creating a task

    Gulp.task([task-name], function() {
        Return gulp.src([glob-array]
            .pipe([your-plugin])
            .pipe([another-plugin])
            .pipe(gulp.dest(dist));
    });

    Notice the “function” keyword. One of the more significant differences between Gulp and Grunt is configuration versus code. Gulp subscribes to a “code” approach while Grunt subscribes to “configuration”.


    Source code for this tutorial

    Start the tutorial using this code base:

    https://github.com/MashupJS/gulp-tutorial


    A completed tutorial can be found here:

    https://github.com/MashupJS/gulp-tutorial-end-result


    Smiley face

    This tutorial and more can be found in

    Gulp - Quick guide to getting up and running today

    http://robertdunaway.github.io

    http://mashupjs.github.io

    The Mashup is a learning tool that serves as a seed project for line-of-business applications. It’s goal is a shortened learning curve for building modern business applications and the reduction of technical debt.

    Smiley face

    This tutorial and more can be found in
    Gulp - Quick guide to getting up and running today

    Gulp Tutorial - Part 2

    Setup

    Here we need to install NodeJS, pull our tutorial project from GitHub, create our NPM package configuration file, and install Gulp both globally and locally.


    Installing NodeJS

    Download and install NodeJS.
    https://nodejs.org/


    Get tutorial project from GitHub

    Code for this tutorial can be found at
    https://github.com/MashupJS/gulp-tutorial


    On the GitHub repo page you’ll see an option to “Download ZIP”.

    Download the ZIP file and extract it where you can work with it.

    To see the end result, go to this repository.
    https://github.com/MashupJS/gulp-tutorial-end-result

    Setup the NPM Project Configuration File

    NPM packages are defined in the package.json file.

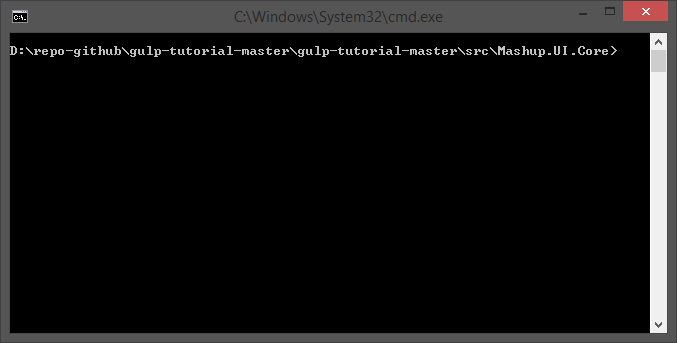
    To create a package.json file, open a command prompt in the root of your client folder.

    For this tutorial, open a command line to the Mashup.UI.Core folder.

    enter image description here

    At the command-line type

    npm init


    An empty package.json is created. Now we can begin installing NPM packages for use by Gulp.

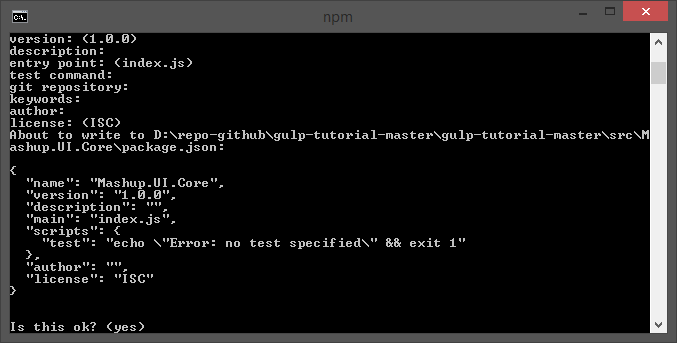
    You will be prompted for several configuration options. For the purposes of this tutorial I’ve skipped these and just pressed Enter for each prompt until complete.


    enter image description here

    And now your package.json is born.

    enter image description here

    For more information about NPM packages
    https://docs.npmjs.com/files/package.json

    Installing NPM packages

    First, let’s install the bower NPM module. We’ll need this to pull client side scripts of which we have many.

    From the command-line

    Npm install bower –g
    

    Retrieve all bower scripts from the command-line

    Bower install
    

    Installing Gulp

    At this point, Gulp can be installed with the following command. Notice the “-g” command. This causes the NPM package to be installed globally.

    Installing Gulp (add “-g” to install globally)

    npm install -g gulp


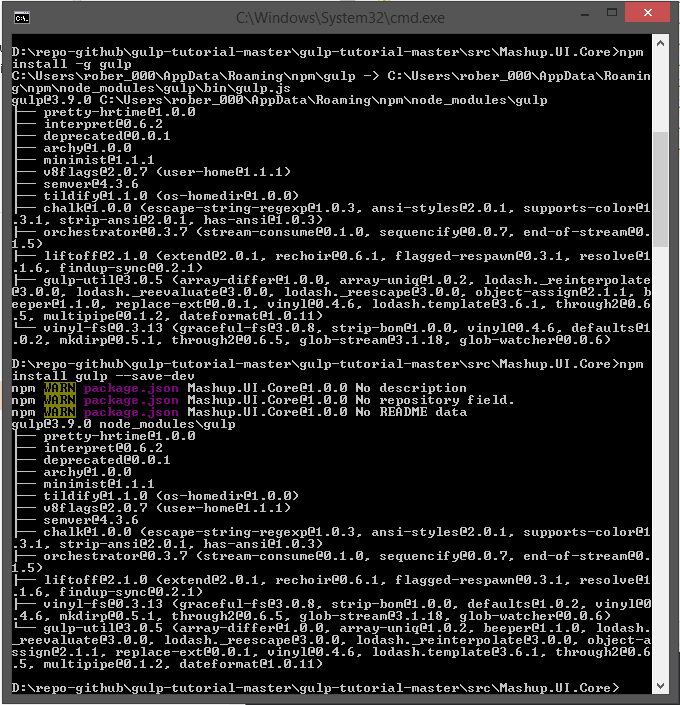
    Gulp must also be installed locally for your project. The global install allows you to execute Gulp commands from the command-line by providing a Command-Line Interface or CLI. The local Gulp install is a plug-in to NodeJS and gets access to Gulp plugins via NPM.

     Npm install gulp --save-dev


    If you’re new to NPM, then just know that a screen that looks like this is completely normal.

    enter image description here

    TIP: Visual Studio Code

    Often I want to view a file without having to open an entire Integrated Development Environment like Visual Studio .NET. It’s just way more than I need to quickly view a file and in fact, often you can’t quickly view a file because VS .NET is so big.

    Download and install Visual Studio Code. You can use programs like Notepad++ or Sublime as well.

    In this case we just installed Gulp globally and locally. This tutorial is a learning tool so in the spirit of learning, each time I perform an action I’m going to poke around and see what changed. After installing Gulp I want to see what has changed.

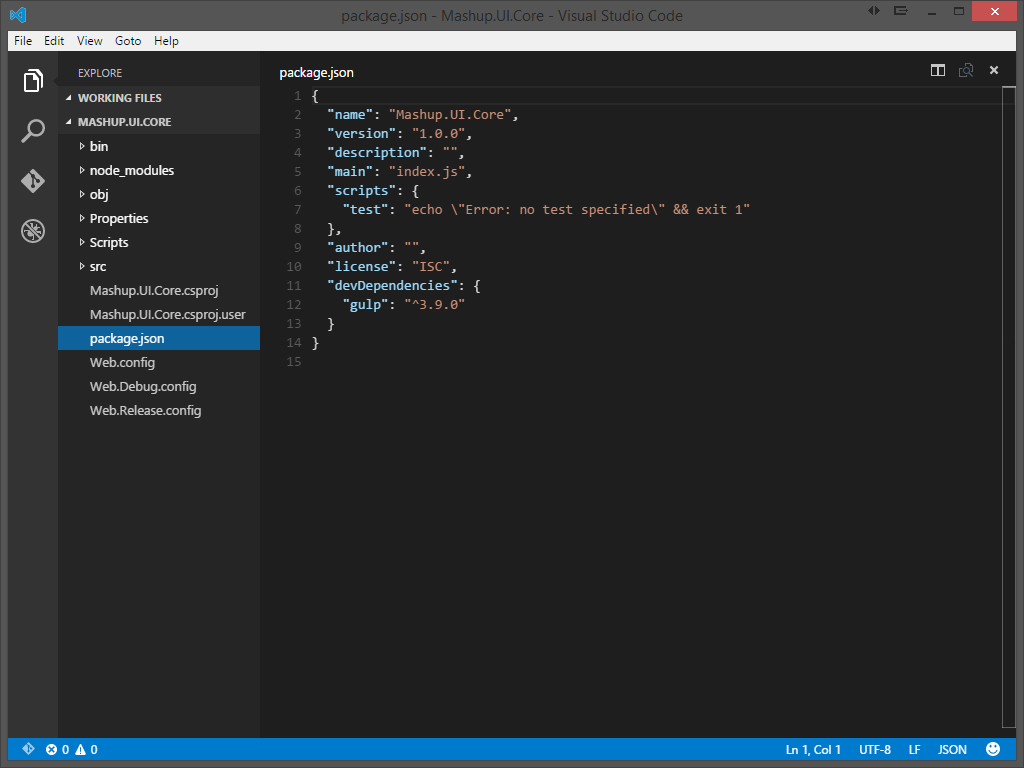
    Right click the package.json file and open it with your favorite code editor and see the change.


    enter image description here

    Package.json stores its information as JSON. Notice the first several attributes. These are the values we opted to provide, or, in my case, not provide.

    When we applied the “–save-dev” options to the NPM install statement, the config was added to the “devDependencies” section.

    The package.json file is a part of your code base and should be included/checked-in to source control. The “node_modules” folder created by NPM should not be checked in to source control.

    When setting up the development environment on a new machine, simply open a command-line to the folder where package.json resides and type:

    npm install
    

    Or

    npm update


    NPM will then go download and install all the packages specified in the package.json.

    For more information on installing NPM packages
    https://docs.npmjs.com/getting-started/installing-npm-packages-locally

    Creating the gulpfile.json

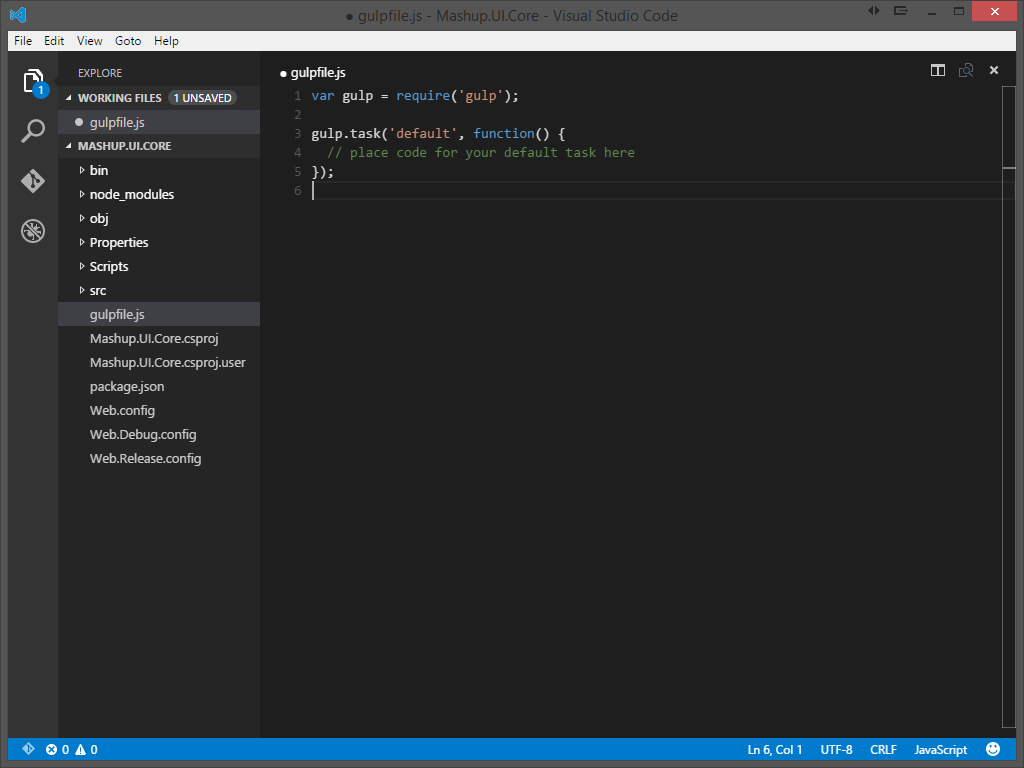
    Create a text file named gulpfile.js with the following content, in the root of your project. Add the following scaffolding to the new gulpfile.js file.

    var gulp = require('gulp');
        gulp.task('default', function() {
        // place code for your default task here
    });


    enter image description here

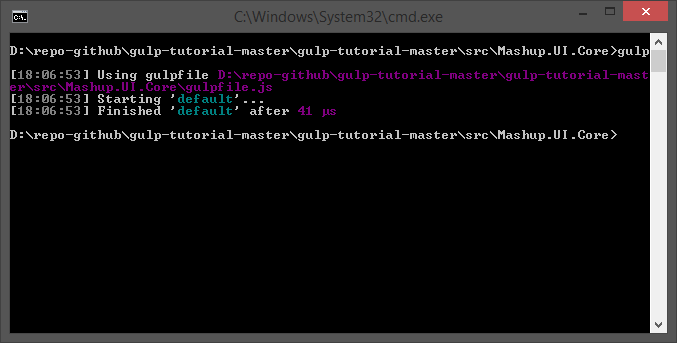
    At this point you can execute Gulp from the command-line. There are no tasks in the “default” task, but Gulp will run.

    At the command-line type “gulp” and press enter.

    gulp


    enter image description here


    Source code for this tutorial

    Start the tutorial using this code base:

    https://github.com/MashupJS/gulp-tutorial


    A completed tutorial can be found here:

    https://github.com/MashupJS/gulp-tutorial-end-result


    Smiley face

    This tutorial and more can be found in
    Gulp - Quick guide to getting up and running today